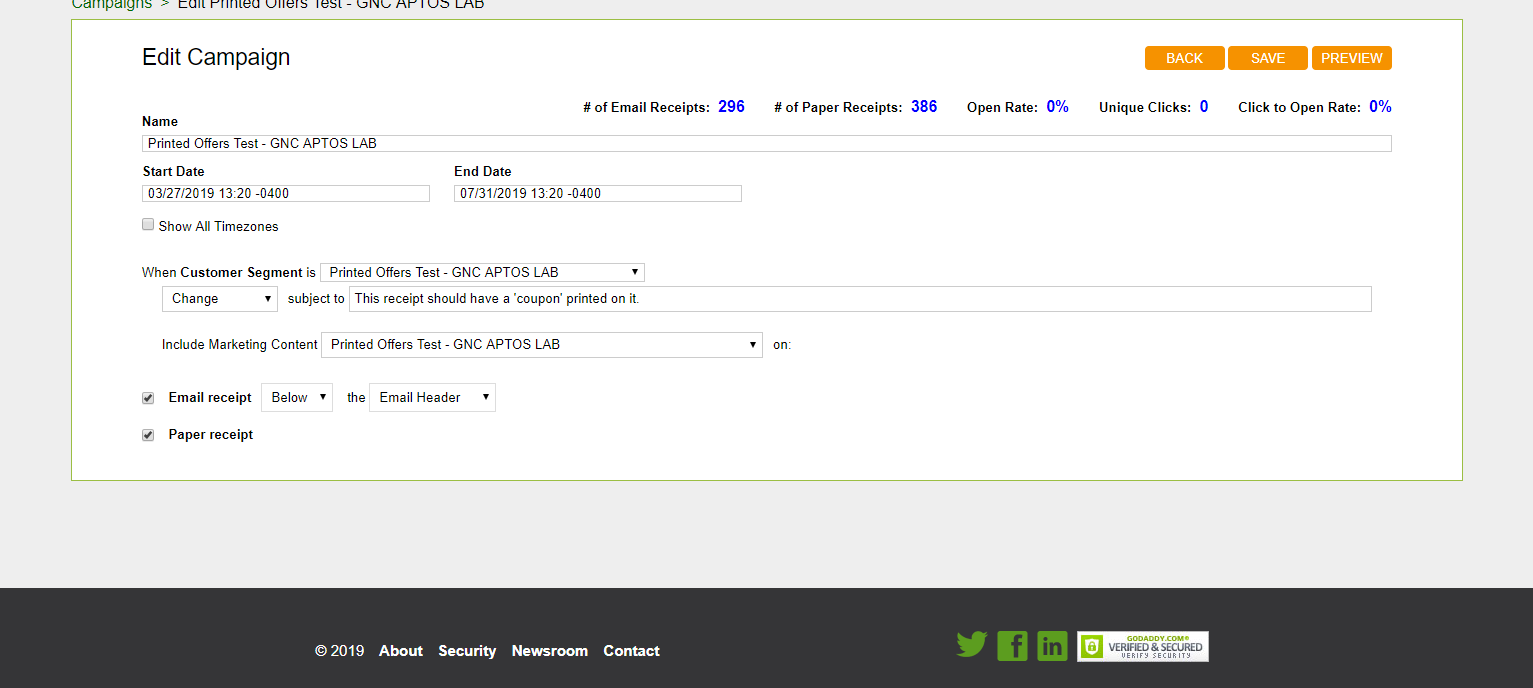
This section is relevant to you if your flexEngage receipt services package includes support for printed offers.
Below is a diagram explaining how printed offers are processed:

Sending the request to the flexEngage API works the same way as it does for digital receipts. If you are already sending receipts to the flexEngage API for digital receipts, no further coding is required except if you are not currently sending the printed receipt transactions to flexEngage. If you are not sending the printed receipts to flexEngage, you will need to make a modification to send printed receipts to the flexEngage API.
The API will then check the transaction and see if it qualifies for a configured printed offer. If the transaction qualifies for a printed offer, the response will contain additional information about the image that needs to print on the receipt, including:
You will need to add logic to check the response for image information, render the information into an image, and include the image on the printed receipt. You can decide whether the image appears at the top or bottom of the receipt. Based on what other merchants do and the responses that they receive from the offers, we recommend putting the offer at the bottom of the receipt.
Below is an example of the JSON payload response returned by flexEngage for a receipt that qualifies for a printed offer.
{
    "customerEmailAddress": "SOME.PERSON@SOMESITE.COM",
    "receiptId": "32c0b76b-516c-44a1-9fda-1e5a2f43b7d8",
    "offers": [
        {
            "offerContentType": "image/png",
            "content": "iVBORw0KGgoAAAANSUhEUgAA...",
            "imageWidth": 250
        }
    ]
}
Once a merchant is set up to provide printed offers, configuring the images and campaigns happens in the merchant portal. The POS does not need to send images to the API; all the configuration happens in the merchant portal.
Setting up the campaigns in the merchant portal is similar to setting up campaigns for digital offers, but there are a few changes:
In the Marketing Content section under Marketing Management, there is a section to add the information to print on the receipts. It can be an image, text or both.
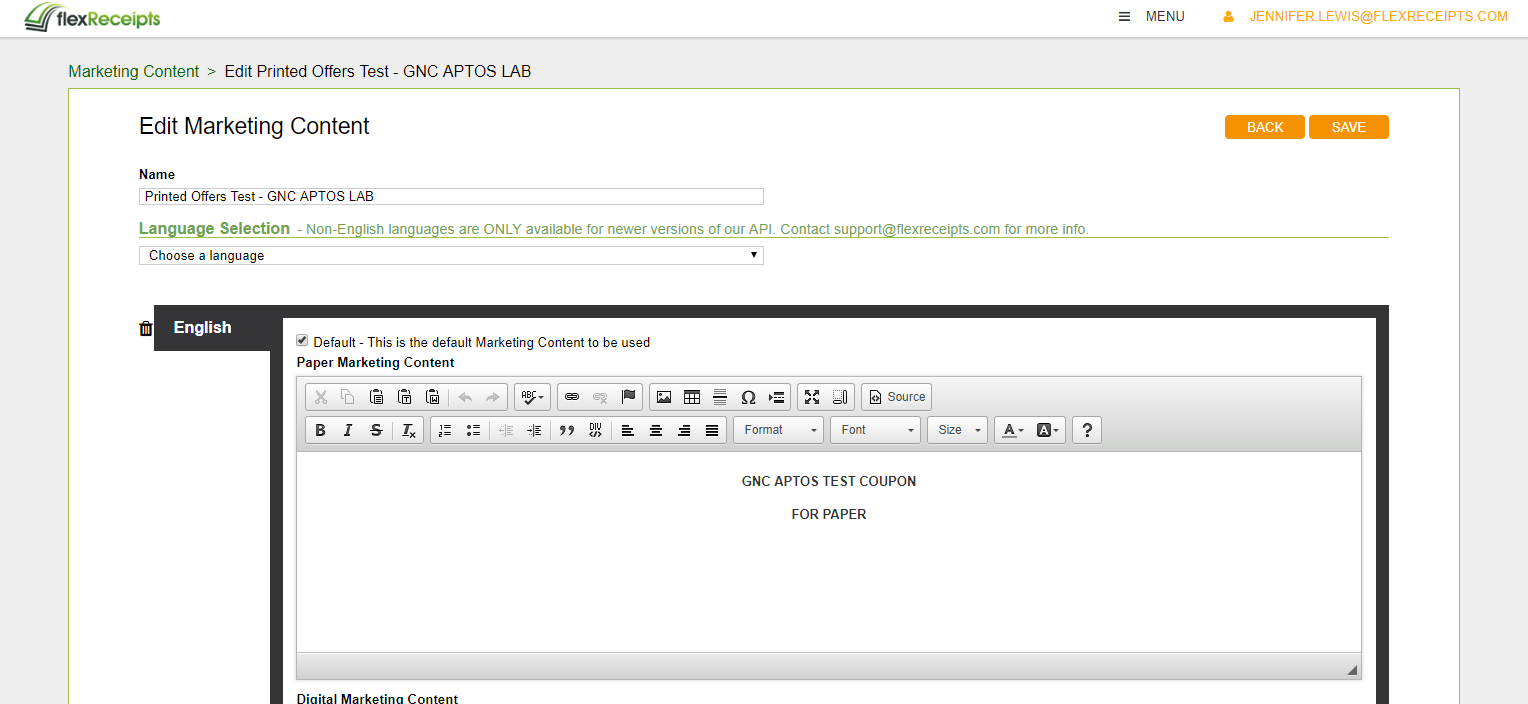
In the Campaigns section under Marketing Management, there is an option to select Paper Receipt. While the example illustrates a campaign that applies to both a digital and printed offer, you can configure the campaign to be strictly a printed offer by selecting Paper Receipt only.